Remote access
From Robin
(→Special setup on LISP) |
|||
| (37 intermediate revisions not shown) | |||
| Line 1: | Line 1: | ||
| - | + | === Using [https://view.uio.no VMware] to use Xilinx' software === | |
| - | + | ||
| - | === Using https://view.uio.no to | + | |
# For the best user experience, we recommend download VMware on your own laptop. Follow the instructions on [https://www.uio.no/english/services/it/home-away/kiosk/programkiosk/index.html this guide]. | # For the best user experience, we recommend download VMware on your own laptop. Follow the instructions on [https://www.uio.no/english/services/it/home-away/kiosk/programkiosk/index.html this guide]. | ||
| - | # When you're logged in, you should be able to find the instance called "Ifi | + | # When you're logged in, you should be able to find the instance called "Ifi Digital Electronics". Start the instance by double clicking it. See icon in Figure 1. |
| + | # Now you can find Vivado, Vitis and Questa in "Applications" or launch them from the terminal. | ||
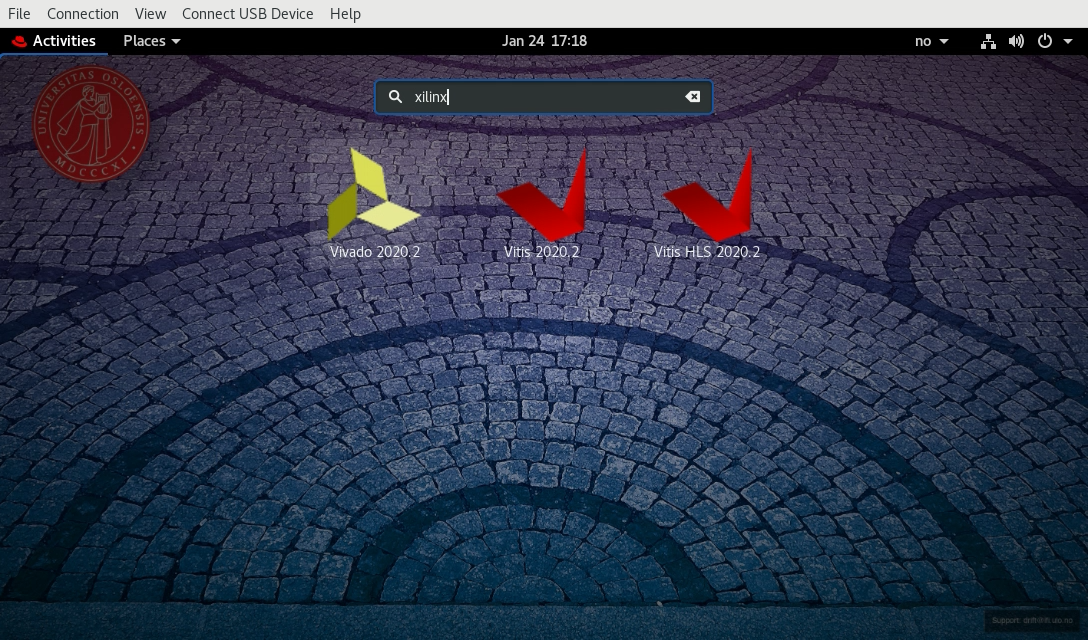
| - | [ | + | See example in [https://robin.wiki.ifi.uio.no/images/d/d2/Xilinx_vmware.png Figure 2]. |
| - | + | {{note|Warning! Store your data on M-drive or github.uio.no. Once you log out of the instance, the instance will be wiped.}} | |
| - | + | [[Image:Ifi_digital_electronics.png|thumb|200px|Figure 1: Ifi Digital Electronics icon]] | |
| - | |||
| - | |||
| - | |||
| - | |||
| - | |||
| - | |||
| - | [[Image: | + | [[Image:Xilinx_vmware.png|thumb|200px|Figure 2: Running Xilinx software on VMware]] |
| - | ==== | + | ==== Programing Zedboards remotly ==== |
| + | We have a cluster of four clients equipped with a mirrored setup in LISP. To access it, follow these instructions: | ||
| - | To be able to | + | # Follow the steps in the [https://robin.wiki.ifi.uio.no/Remote_access#Using_VMware_to_use_Xilinx.27_software first section]. |
| + | # To access the the Xilinx tools, <code>ssh</code> to the zedboard cluster: <code>ssh -Y <username>@zedboard.ifi.uio.no</code> | ||
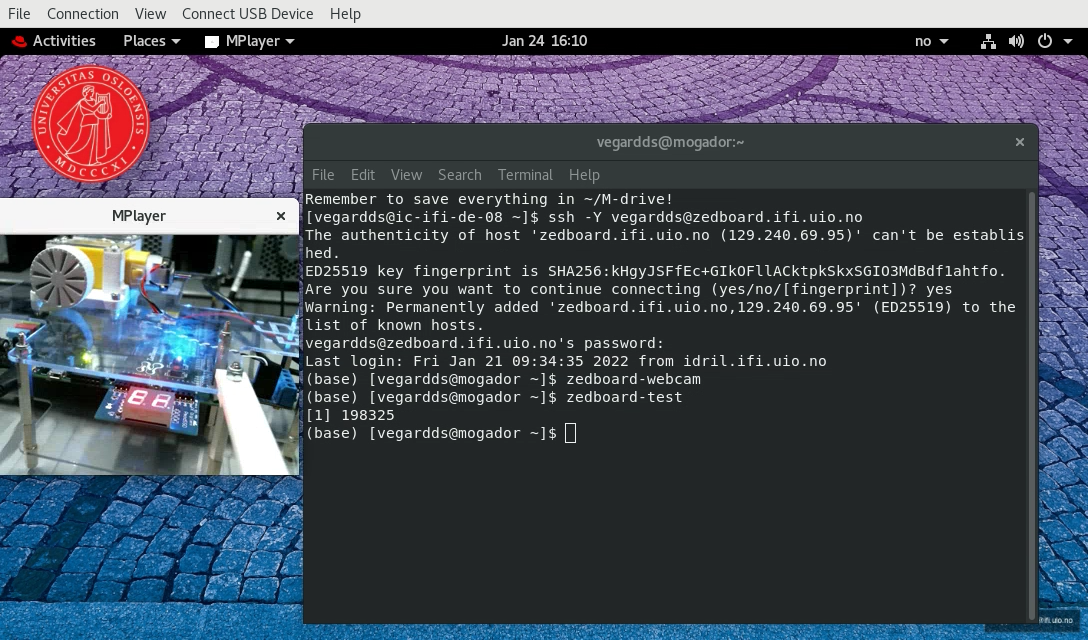
| + | # In the terminal use the premade alias <code>zedboard-webcam</code> to be able to monitor the ZedBoard. '''Note:''' Only '''one''' user can use <code>zedboard-webcam</code> at a time, so please remember to <code>exit</code> when you are finished. | ||
| + | # You should now be able to program the ZedBoard. See example in [https://robin.wiki.ifi.uio.no/images/c/ce/Zedboard-service.png Figure 3]. | ||
| - | + | [[Image:Zedboard-service.png|thumb|200px|Figure 3: <code>zedboard-webcam</code> and <code>zedboard-test</code> on zedboard.ifi.uio.no cluster]] | |
| - | + | ||
| - | + | ||
| - | + | ||
| - | [[ | + | |
| + | ==== Zedboard workstation custom aliases ==== | ||
| + | We have some premade aliases available wherever there is ZedBoard setups. | ||
| + | |||
| + | zedboard-webcam #Displays the webcamera showing the zedboard connected to the computer. | ||
| + | zedboard-wipe #Wipes the board (use this before leaving the machine) | ||
| + | zedboard-test #Displays a testpattern on the seven segment display. Should be readable. | ||
| + | |||
| + | ==== Killing lingering tasks==== | ||
| + | Sometimes, your processes or tasks at the remote host will not end gracefully after completion. To enable other students to use the same camera /or other hardware, please make sure that you kill processes remaining after completing your task. | ||
| + | |||
| + | To show all processes/tasks type | ||
| + | ps aux | ||
| + | Find the PID number for '''mplayer tv://device=/dev/video0'''. | ||
| + | |||
| + | The PID number is the number to the left of USER. | ||
| + | |||
| + | To stop the process, type | ||
| + | kill -9 <PID number> | ||
| + | |||
| + | === Xilinx software via <code>ssh</code> === | ||
| + | |||
| + | The full version of Xilinx software used in [https://www.uio.no/studier/emner/matnat/ifi/IN3160/ in3160] and [https://www.uio.no/studier/emner/matnat/ifi/IN5200/index-eng.html in5200] is accessible at UiO's hosts. To access the tools, follow these steps. | ||
| + | |||
| + | # Follow the steps in the [https://robin.wiki.ifi.uio.no/Remote_access#Using_VMware_to_use_Xilinx.27_software first section]. | ||
| + | # Open Vivado 2020.2, Vitis 2020.2, Vitis HLS 2020.2 or Questa 2020.4. | ||
| + | If the assigned computer is overloaded you can use: | ||
| + | ssh -Y <username>@login.ifi.uio.no | ||
| + | Remember to set up the <code>.bashrc</code> file as described [https://robin.wiki.ifi.uio.no/FPGA_tools here] to make it work. | ||
Alternativly, you can <code>ssh</code> directly from your own computer. To be able to get GUI aplications running, remember the -Y flag. On Windows you're required to use [https://www.mn.uio.no/ifi/tjenester/it/hjelp/startpakke/Programmer/Win/SSH/putty.html PuTTy] and on MacOS we recommend [https://www.mn.uio.no/ifi/tjenester/it/hjelp/it-vakten/laptophjelp/laptophjelp-guide/tilgang-til-uio-hjemmeomrade-og-ifi-linux-terminal/ssh/ XQuartz]. Not that we don't recommend this method as it depends on the setup of your local machine. Hence, we won't necessarily give support if you don't manage to set it up. | Alternativly, you can <code>ssh</code> directly from your own computer. To be able to get GUI aplications running, remember the -Y flag. On Windows you're required to use [https://www.mn.uio.no/ifi/tjenester/it/hjelp/startpakke/Programmer/Win/SSH/putty.html PuTTy] and on MacOS we recommend [https://www.mn.uio.no/ifi/tjenester/it/hjelp/it-vakten/laptophjelp/laptophjelp-guide/tilgang-til-uio-hjemmeomrade-og-ifi-linux-terminal/ssh/ XQuartz]. Not that we don't recommend this method as it depends on the setup of your local machine. Hence, we won't necessarily give support if you don't manage to set it up. | ||
| + | |||
| + | Note that programming the zedboard (wipe/test or other) takes at least 15 seconds | ||
| + | |||
| + | === ''Optional:'' TCL script for programming a board === | ||
| + | If you are able to generate your .bit file on your own PC, you can choose to program the zedboards on LISP without starting the graphical user interface for vivado. | ||
| + | |||
| + | # Connect to the Digilent Cable on localhost:3121 | ||
| + | open_hw_manager | ||
| + | connect_hw_server -url localhost:3121 | ||
| + | #current_hw_target [get_hw_targets */xilinx_tcf/Digilent/12345] Alternative but not as flexible | ||
| + | current_hw_target [lindex [get_hw_targets] 0] | ||
| + | open_hw_target | ||
| + | |||
| + | # Program the Device | ||
| + | current_hw_device [lindex [get_hw_devices] 1] | ||
| + | set_property PROGRAM.FILE {'''./my_file.bit'''} [lindex [get_hw_devices] 1] | ||
| + | |||
| + | program_hw_devices [lindex [get_hw_devices] 1] | ||
| + | refresh_hw_device [lindex [get_hw_devices] 1] | ||
| - | + | Store these lines in "'''my_scipt.tcl'''", and change "'''my_file.bit'''" to the bitfile name in use. Then program the board by running the command: | |
| - | + | vivado -mode batch -source '''my_script.tcl''' | |
| - | + | ||
| - | + | ||
Current revision as of 08:27, 17 August 2023
Contents |
Using VMware to use Xilinx' software
- For the best user experience, we recommend download VMware on your own laptop. Follow the instructions on this guide.
- When you're logged in, you should be able to find the instance called "Ifi Digital Electronics". Start the instance by double clicking it. See icon in Figure 1.
- Now you can find Vivado, Vitis and Questa in "Applications" or launch them from the terminal.
See example in Figure 2.
 Warning! Store your data on M-drive or github.uio.no. Once you log out of the instance, the instance will be wiped.


Programing Zedboards remotly
We have a cluster of four clients equipped with a mirrored setup in LISP. To access it, follow these instructions:
- Follow the steps in the first section.
- To access the the Xilinx tools,
sshto the zedboard cluster:ssh -Y <username>@zedboard.ifi.uio.no - In the terminal use the premade alias
zedboard-webcamto be able to monitor the ZedBoard. Note: Only one user can usezedboard-webcamat a time, so please remember toexitwhen you are finished. - You should now be able to program the ZedBoard. See example in Figure 3.

zedboard-webcam and zedboard-test on zedboard.ifi.uio.no cluster
Zedboard workstation custom aliases
We have some premade aliases available wherever there is ZedBoard setups.
zedboard-webcam  #Displays the webcamera showing the zedboard connected to the computer.
zedboard-wipe    #Wipes the board (use this before leaving the machine)
zedboard-test    #Displays a testpattern on the seven segment display. Should be readable.
Killing lingering tasks
Sometimes, your processes or tasks at the remote host will not end gracefully after completion. To enable other students to use the same camera /or other hardware, please make sure that you kill processes remaining after completing your task.
To show all processes/tasks type
ps aux
Find the PID number for mplayer tv://device=/dev/video0.
The PID number is the number to the left of USER.
To stop the process, type
kill -9 <PID number>
Xilinx software via ssh
The full version of Xilinx software used in in3160 and in5200 is accessible at UiO's hosts. To access the tools, follow these steps.
- Follow the steps in the first section.
- Open Vivado 2020.2, Vitis 2020.2, Vitis HLS 2020.2 or Questa 2020.4.
If the assigned computer is overloaded you can use:
ssh -Y <username>@login.ifi.uio.no
Remember to set up the .bashrc file as described here to make it work.
Alternativly, you can ssh directly from your own computer. To be able to get GUI aplications running, remember the -Y flag. On Windows you're required to use PuTTy and on MacOS we recommend XQuartz. Not that we don't recommend this method as it depends on the setup of your local machine. Hence, we won't necessarily give support if you don't manage to set it up.
Note that programming the zedboard (wipe/test or other) takes at least 15 seconds
Optional: TCL script for programming a board
If you are able to generate your .bit file on your own PC, you can choose to program the zedboards on LISP without starting the graphical user interface for vivado.
# Connect to the Digilent Cable on localhost:3121
open_hw_manager
connect_hw_server -url localhost:3121
#current_hw_target [get_hw_targets */xilinx_tcf/Digilent/12345] Alternative but not as flexible
current_hw_target [lindex [get_hw_targets] 0]
open_hw_target

# Program the Device
current_hw_device [lindex [get_hw_devices] 1]
set_property PROGRAM.FILE {./my_file.bit} [lindex [get_hw_devices] 1]

program_hw_devices [lindex [get_hw_devices] 1]
refresh_hw_device [lindex [get_hw_devices] 1]
Store these lines in "my_scipt.tcl", and change "my_file.bit" to the bitfile name in use. Then program the board by running the command:
vivado -mode batch -source my_script.tcl
