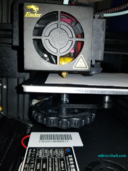
Ender
From Robin
Contents |
Getting started with 3D printing on the Ultimakers
The workflow in any prototyping using 3D printers is:
- Retrieving/creating a 3D model: You can fetch files from creator spaces such as Thingiverse or model them your self, using a CAD tool such as Fusion360 or SolidWorks.
- Generate paths for the 3D printer: We normally use Cura for slicing.
- Last preperations: Make sure that the build plate is clean, the machine is calibrated, and when you start your print please make sure the first layer turns out as expected.
Cura
The official guideline from the manufacturer can be found here. Note that we have our own additional guidelines to increase the life expectancy of the printers.
Software setup
Always make sure you are using the correct printer, in this case Crealty Ender 3, in Cura. Moreover we recommend the following setup:
 Quality: Normal (layer height) (0.15)
Infill: Density (<=30%)
Material: Printing temp (200), Build plate (60). Diameter (1.75), Flow (100),
optional(Speed: Print speed(50), Travel speed(120), Print acc.(3000), Travel acc.(4000)
Build plate adhesion: Brim(true))
Version
As a rule of thumb, we recommend using the latest version of Cura.
Filament
We only use filament from Polymaker, which is due to the high reliability and ease of use. The main printing material we use in the labs is PLA with Ø:1.75 mm dimension. The material needs to be set up correctly in the printers UI.
Hardware setup
The standard nozzle size is .4 mm.
Before pressing start
Make sure the build plate is clean. Use lukewarm flowing water to get rid of leftover materials, glue, or dirt. Please use the HC toilet and not the sink in the kitchen. After starting the print, make sure that the first layer turns out as expected. Most errors arise during the first layer of the print job.
Calibration
Follow these instrucions [2]:

- Position Hotend Tip over Leveling Knob
- Completely lower Hotend Tip towards bed
- Place a piece of paper under the Hotend Tip. See Figure 1.
- Tighten knob until it slightly catches the paper
- Repeat with other 3 sections of the bed
- Test center of bed to confirm a completely flat bed. Raise or lower other 4 corners and re-level if necessary
Note: Make sure there is no extra pressure on the bed. Any pressure on the bed will cause incorrect leveling due to the compression of the springs on the leveling screws.
Change filament
Make sure to only use the Polymaker PLA 1.75mm filament on the Ender printers. If you need to use something else, contact faculty. We will dispose any other filament than the specified material.
- Move hot-end to Home- position:
- Prepare.
- Auto home.
- Heat nozzle:
- Control
- Temperature
- Nozzle
- Set to 200C
- Pull out the current filament while pressing the clamp by the extruder. See Figure 2.
- Put the new filament spool in the machine.
- Insert the new filament into the extruder and purge det hot-end. Remember to keep the nozzle at 200C.
- Set the nozzle temperature to 0C
When the print job is finished
When the print is finished clean the plate again. If the object is stuck, you may use a scraping tool. However, make sure you don't harm the plate. Hence use scraping tools with care.
Our Enders
We have 12 Enders in total in our printer rack at 4321.
| Printer name | Responsable (username) |
|---|---|
| ada | didrikre |
| alan | eirberg |
| albert | fridamei |
| bjarne | hermanno |
| elon | ingunriv |
| isaac | julienaa |
| larry | kamilok |
| leslie | magnuese |
| linus | mariunp |
| nikola | orjanstr |
| sergey | talehs |
| steve | tobiasrp |
Errors
If a print goes wrong, do the accordingly:
- Check setup in Cura and on the printer.
- Rewash the bed level.
- Calibrate bed level.
If this does not help, please notify the group-teacher or the engineer.
Clog
Clogging of the nozzle typically occurs when the workpiece has tilted due to overhang, wrong settings in Cura, or wrong filament type. A solution to clogged nozzle is using the Atomic Method

